Sonntag, 28. Dezember 2014

Mannish Man T-Shirt

Guten Nachmittag

Grosse Neuigkeit! Dies ist mein erster Post über ein Kleidungsstück für Männer. Und was wäre passender für einen Mann als ein T-Shirt mit einem wahrhaft männlichen Motiv? Die Rede ist von Mannish Man, the Manly Minotaur aus Adventure Time.


Da es eine Überraschung war, musste Dominik Modell stehen
 
Das ist der Lieblings-Charakter meines Bruders. Ich machte ihm zwei T-Shirts auf Weihnachten. (Anfangs hatte ich gar nicht vor, gleich zwei Shirts zu machen, druckte aber zur Sicherheit auf verschiedene Stoffe. Als dann beide gut herauskamen, konnte ich mich nicht entscheiden, welche Farbe mir besser gefällt bzw. welche meinem Bruder mehr zusagen würde). Damit wollte ich ihm danken, dass er mir diese super Serie gezeigt hat. Es dauerte zwar etwas länger, bis die Serie von mir die Beachtung bekam, die sie verdient, aber besser spät als nie, nicht war?
Merci :-)

Das Sieb bemalen

Schablone (rechts) und Druck (links)

Technisch gesehen ist der Druck eine Kombination aus Schablonendruck (für die orangen Flächen) und Siebdruck (für die schwarzen Linien). Die T-Shirts sind noch aus einem anderen Grund eine kleine Innovation: Das ist mein erstes Projekt in diesem Blog, bei dem ich Jersey verwende. Ich habe erst vor Kurzem angefangen, damit zu arbeiten und finde es sogar etwas einfacher als Baumwolle, weil das Material kleine Unebenheiten vergiebt. Andererseits... T-Shirts sind ja auch etwas einfacher als Röcke mit Rüschen dran. Mal schauen, wie lange es geht, bis ich meine Meinung ändere.

Alles Gute
Eta Carina


Good afternoon

What novelty! This is my first post about a piece of clothing for a male person. And what would be more adequate for a man to wear than a t-shirt with a truly mannish motif on it? I'm talking about Mannish Man, the Manly Minotaur from Adventure Time. It's my brother's favourite character and I made him two shirts for christmas. (I didn't plan to make two shirts, I just tried several prints and in the end I couldn't decide which colour I liked better). Like this I wanted to thank my brother for showing me this awesome series. Allthough it took me quite a while until I really gave this show the attention it deserves, but I guess it's better late than never. Thank you!

Technically, the print is a combination of stencil printing (for the orange areas) and screen printing (for the black lines). And there's another "technical innovation": This is my first project with stretchy fabric. I only learned how to work with this very recently and I think it's easier than with cotton, because the fabric forgives little irregularities. Allthough T-Shirts are naturally easier than ruffly skirts. We'll see if I won't change my opinion.

All the best
Eta Carina

Dienstag, 23. Dezember 2014

Weihnachtskarten 2014

Ihr Lieben

Wie letztes Jahr habe ich auch diesmal wieder einige Weihnachtskarten gemacht. Dieses Jahr sind sie siebgedruckt... oder gesiebdruckt? Wie auch immer, ich hatte noch kleine Holzrahmen übrig, die ich mit Vorhangstoff bespannt und anschliessend bemalt habe. Wer wissen will, wie man das ganz genau anstellt, kann es in diesem älteren Post nachlesen:
Siebdruck mit Bilderrahmen


Einige technische Anmerkungen für alle, die selber drucken (wollen):
1. Bisher hatte ich Riesen-Radierer als Rakel verwendet. Bankkarten funktionieren aber auch, wie ich hier herausgefunden habe. Das geht natürlich bei kleinen Rahmen am Besten.

2. Ich hatte solche Bilderrahmen bisher nur zum Stoff bedrucken verwendet. Das Bedrucken von Papier stellte sich als etwas schwieriger heraus. Am schwierigsten war, geeignete Druckfarben zu finden. Acrylfarben wollte ich nicht nehmen, denn diese wären nach kurzer Zeit eingetrocknet und hätten das Sieb unwiderruflich verklebt. Also probierte ich Gouache- und Linoldruckfarben. Diese trocknen weniger schnell, Gouache ist sogar wieder mit Wasser lösbar, nachdem es schon getrocknet ist. Allerdings hatte ich von beiden Farben solche, die zu flüssig waren und darum verliefen (links) und solche, die zu trocken waren und darum kaum durch den Stoff durchkamen (rechts). Bei den trockenen Farben sah man deswegen die Stoffstruktur, was ich eigentlich schön fand. Nach einigen Drucken war dann das Sieb aber leider verklebt und ich musste es neu waschen. Wenn ihr ebenfalls Papier so bedrucken wollt, solltet ihr also besser mehrere Farbsorten im Haus haben und zuerst testen, welche am besten geeignet sind. Beim Stoff bedrucken stellt sich dieses Problem weniger, da die Farben auf den Verwendungszweck abgestimmt sind und vom Stoff auch besser aufgesaugt werden.

So, das waren jetzt aber genug technische Details! Jetzt wünsche ich euch allen ganz schöne Festtage!Liebe und Lebkuchen
Eta Carina


Dear readers

Like last year I made some Christmas cards. This year I screenprinted them. I still had some small wooden frames left which I coated with curtain fabric. Then I painted the motif on the frame. I wrote a more detailed tutorial about this technique some months ago:
Screenprinting with wooden frames

Here are some technical tipps for everyone who wants to try this too:
1. I normally use huge erasers to press the paint through the fabric. If you don't have such a thing you can also use plastic bank cards. This works best with small frames.

2. Printing on paper turned out to be a little bit more complicated than printing on fabric. The most difficult thing was finding adequate paint. I didn't wan't to use acrylic paint because it dries very fast and would have sealed the screen irremovably. So I tried gouache and linoleum print paint instead. They dry slower, you can even resolve gouache with water after it dried. But of both kinds of paint I had specimen that were too liquid and would dissolve (last picture on the left) and I had others that were too dry and would hardly make it through the fabric (on the right). The fabric structure remained visible when I printed with the dry colours. I liked the look of that, but after a few prints only very little paint came through, because the paint had already started to dry and I had to wash the frames and start new.
So if you want to screenprint on paper, better buy several different sorts of paint and test in advance.
Printing on fabric is easier because there are special inks for this task and the fabric absorbs the excess paint.

So, that's definitely enough technical details for now! Now I really wish you happy holidays!

Love and gingerbread
Eta Carina


Mittwoch, 3. Dezember 2014

Sommerkleid im Winter

... Weil es wieder mal laaaange gedauert hat, bis ich damit fertig geworden bin. Tatsächlich begann ich im Juni damit, als ich kleine Siebdruckrahmen bastelte und Stoffstreifen damit bedruckte. Der ganze Rest hat sich dann nach und nach um diese Drucke herum entwickelt. Anfangs wollte ich eigentlich nur einen Rock machen, aber das sah seltsam aus.
Am Anfang war ich unsicher, ob das Kleid mit diesen Streifen mittendrin eine schöne Form bekommen würde, da es einen Wechsel zwischen "gerüscht - nicht gerüscht - gerüscht" gibt. Aber gerade dadurch fällt der Stoff meiner Meinung nach sehr schön. Und zum Glück habe ich diese wunderschöne Spitze gefunden. Sie ist zwar etwas dunkel, rahmt die Balkone aber gut ein.
Für den Moment bin ich zufrieden mit dem Resultat. Wenn ich dann mal Zeit habe, würde ich beim Ausschnitt vielleicht noch mehr Stoff einsetzen, damit er auch am Rücken ordentlich Rüschen bekommt. Auch eine Art kurze Flügelärmel darunter wären hübsch. Aber für's erste schaue ich lieber, dass ich mir etwas Wärmeres schneidere. Obwohl ich bei dem Tempo vielleicht doch lieber schon für den Sommer plane.

Schönen Abend
Eta Carina


... Because it just took me soooo song to finish this! I started with it in June, actually, when I made those small frames for printing. I printed small balconies on some fabric stripes and the dress really evolved from those prints bit by bit (In the beginning it was supposed to be just a skirt, but it simply didn't look right).
Initially I wasn't sure if those stripes wouldn't give the dress a strange shape, because there was this "ruffled - flat - ruffled"-mix. But as it turned out this makes the fabric fall very nicely. And I was really lucky to find such beautiful lace. It is a little bit too dark, but otherwise it is a good frame for the prints.
For the moment I am happy with the result. When I have some more time I will maybe add some more fabric to the neckline (there aren't enough ruffles at the back). Small cap sleeves might also look cute. But for now I'd rather work on something warmer. Although, if I proceed at this rate, I might as well plan for summer now.

Have a nice evening
Eta Carina


Donnerstag, 13. November 2014

Luzerns D.I.Y. - November

Ihr Lieben

Von mir selbst gibt es im Moment zwar nichts Neues, aber um mich herum scheint diesen Monat alles auf Handarbeit eingestellt zu sein. Deshalb hier drei Lese- und Veranstaltungs-Tipps für alle Leute, die öfters mal nach Luzern kommen und sich für Selbstgemachtes begeistern:

1.
Das Kulturmagazin 041 widmet ihre aktuelle Ausgabe dem Thema Textilien. Es werden Kulturschaffende aus der Region vorgestellt, die mit Textilien arbeiten, wie z.B. einer Theaterschneiderin, jungen Designerinnen oder einem Kollektiv, das den Leuten das Stricken und Färben näher bringt. In einem Selbstversuch erzählt jemand von seinen ersten Stickversuchen seit Jahren. Ein anderer Bericht sinniert darüber, warum die Handarbeit wieder so beliebt geworden ist. Ich hatte natürlich viel Freude an dieser Ausgabe.
http://www.null41.ch/magazin/

2.
Am Samstag, 15. November findet im Paulusheim der Koffermarkt statt. Leute präsentieren und verkaufen ihre selbst gemachten Produkte. Die Auswahl ist gross, Hauptsache, es passt in einen Koffer. Ich war letztes Jahr schon dort (und am Season-Market, siehe weiter unten) und fand die es sehr anregend, so viele Ideen auf einen Haufen zu sehen.
http://www.koffermarkt-luzern.ch

3.
Nur zwei Wochen später, am Sonntag, 30. November gibt es im Neubad eine ganz ähnliche Veranstaltung: Dann ist nämlich der Guzuu Season-Market. (Für alle, die's nicht kennen: Guzuu ist eine Art kleines Etsy, aber eher auf die Schweiz ausgerichtet.) Auch hier gibt es allerlei Selbstgemachtes zu kaufen. Die Palette reicht von Schmuck über Karten zu Lebkuchen bis zu ganzen Kleidungsstücken und ist auf Weihnachten ausgerichtet. Um sich frühzeitig mit kleinen Geschenken einzudecken. Alles klar?
http://www.neubad.org/event/guzuu-season-market-2-christmas-edition

Wer also grad in der Nähe ist, sollte sich diese Sachen ruhig mal anschauen.
Möget ihr es warm und gemütlich haben
Eta Carina


Hello my dears

There's nothing new from myself at the moment, but all around me everything seems to be about D.I.Y. this month. So here are three tipps for all the people around Lucerne who love selfmade things.

1.
This months' issue of "041-das Kulturmagazin" is all about textiles. They introduce local people who work with textiles, for example a theater dressmaker, young designers or two artists that teach people how to knit and dye. One writer tells about his experiences when restarting to knit after years. Another article reasons about why crafts have become so popular again in the recent years. As you can imagine, I really loved this issue.
http://www.null41.ch/magazin/

2.
On Saturday, the 15th of November is the "suitcase market" at the Paulusheim. Different people present and sell their homemade products. There is a big choice, everything is allowed as long as it fits into a suitcase. I was there as a visitor last year (and at last years' season market, as you can see below) and I found it really thrilling to see all those different ideas at one place.
http://www.koffermarkt-luzern.ch

3.
Only two weeks later, on Sunday, the 30th of November there's a very similar event at the Neubad: The Guzuu Season-Market. (For those who don't know Guzuu: It's like a Mini-Etsy, but focused on Switzerland.) Here you can also find all kinds of selfmade things, from jewelry to cards to gingerbread to dresses. A lot of stuff is Christmas-themed. So you can get some small presents on time. You see?
http://www.neubad.org/event/guzuu-season-market-2-christmas-edition

So there's really a lot to discover around here this month
Stay warm and cozy!
Eta Carina

Montag, 3. November 2014

Nebel und Kappe

Guten Abend!

Ich hoffe, ihr hattet ein schönes, ruhiges oder unheimliches Wochenende. Wir verbrachten Allerheiligen damit, am See spazieren zu gehen, zusammen mit hunderten von anderen Leute auch. Es lag Nebel über dem See und das Licht änderte sich von Sekunde zu Sekunde. Da musste ich einfach ein paar Fotos machen. Ich trug meine neue Wollkappe, die ich vor etwa zwei Wochen gehäkelt hatte:


Ich war recht zufrieden mit meiner Kappe, bis Dominik mich darauf aufmerksam machte, dass das Muster im oberen Teil nicht etwa an eine Blume, sondern wie viele unheimliche Gesichter aussieht. Egal, warm gibt sie trotzdem.

Das wärs für den Moment. Eine schöne Woche wünscht
Eta Carina


Good evening!

I hope you had a pleasant, quiet or spooky week-end. We spent All Saints' Day with a walk along the lake, together with hundreds of other people. There was a lot of mist and the light kept changing every few seconds. I just had to take some photos. I wore my new woollen hat which I crocheted about two weeks ago. I was quite happy with it until Dominik pointed out that the upper pattern didn't really look like a flower (as I had intended), but rather like many scary faces. Well, at least my ears stay warm.

That's it for the moment. Have a nice week
Eta Carina

Freitag, 24. Oktober 2014

Spinnennetz-Stulpen


Guten Abend

Diese Woche habe ich mir ein Paar Spitzenstulpen gehäkelt. Das Muster erinnert an Spinnennetze. Fein, Halloween ist ja schliesslich auch bald.
Ich nahm ein Muster von mypicot als Vorlage. Mi der Zeit vereinfachte ich das Muster aber (ich liess die festen Maschen weg), damit das Netz feiner wurde.
http://www.mypicot.com/2018.html

Getragen sehen die Stulpen etwa so aus:


Einige Gedanken zum Fotografieren der eigenen Hände auf eine möglichst klare, ästhetisch ansprechende und doch mühelos und natürlich erscheinende Art:

Es ist unmöglich!
Wie soll man eigentlich die Sachen, die man gemacht hat, fotografieren? Einfach schnell abknipsen geht natürlich nicht, für was habe ich schliesslich Kunst studiert! Aber aufwändig inszenieren ist dann auch wieder nicht so das Wahre, schliesslich will man ja nicht übertreiben und wer hat denn eigentlich Zeit für so was? Die naheliegendste Methode: Man fotografiert den Gegenstand vor einem einigermassen neutralen Hintergrund mit genügend Licht. Damit möglichst wenig vom eigentlichen Objekt ablenkt, klar! Der gemusterte Stoff und das Spitzenshirt scheinen diesem Grundsatz zwar etwas zu widersprechen, aber Eleganz muss schliesslich sein! Ja, auch in der Küche. Denn dort fand ich mich wieder, weil die Küche der hellste und aufgeräumteste Ort in der ganzen Wohnung ist. Nun befanden sich die Dinge, die ich fotografieren wollte, aber an meinen Händen. Aber diese waren ja mit Fotografieren beschäftigt. Einfach die Hände auszustrecken und abzufotografieren, ergab recht bizarre Fotos, weil meine Hände perspektivisch verzerrt wurden. Aber warum nicht einfach zeigen, was Sache ist? Die Hände beim Fotografieren fotografieren, ein Hand-Selfie, toll! Dann sind sie sozusagen beschäftigt während sie, also ich, sie fotografiere, das wirkt dann auch total natürlich und überhaupt nicht gestellt. Also musste ein Spiegel her. Denn Spiegel in der Küche sind ja auch ganz normal, falls man z.B. schauen will, wie man so beim Kauen aussieht.


So bin ich dann zum Schluss gekommen, dass ich die Stulpen eigentlich gleich so fotografieren könnte:

Aber jetzt mal ernsthaft: Worauf achtet ihr, wenn ihr Sachen für euren Blog fotografiert? Wie wichtig findet ihr das Präsentieren im Vergleich zum Herstellen selbst? Macht ihr euch viel Gedanken um die Inszenierung oder soll es einfach möglichst unkompliziert sein? Habt ihr mit der Zeit vielleicht sogar einen bestimmten Stil entwickelt, z.B. eine Pose oder einen Hintergrund, den ihr immer wieder verwendet?

Liebe Grüsse
Eta Carina


Good evening!

This week I crocheted a pair of lace cuffs. The pattern reminds me of spiderwebs, which I really like, because soon it's Halloween.
I used a pattern from mypicot as a source, but I altered it (I left out the single crochets) so the net would become more delicate.
http://www.mypicot.com/2018.html

I also took some photographs while wearing them…

A few words about taking pictures of your own hands, making the pictures look precise and appealing as well as effortless and natural at the same time

It's impossible!
How to take picture of your selfmade things? Unfortunately, just taking a few snapshots isn't an option for a former art student. But an elaborate composition takes waaay too much time and it would also be a little bit pretentious, wouldn't it? So the easiest thing is to put your object in front of a more or less neutral background with enough light. You know, so nothing will distract the viewer from the thing itself. The patterned fabric and my lace-shirt might contradict this principle, but I must insist on a little bit of elegance here. Even in the kitchen. Because that's where I ended up, the kitchen being the tidiest and best-lit room. But there are more problems to solve: The objects I wanted to take a picture of where on my hands. But the hands where busy taking those photographs. Just reaching out with my hands and photographing them resulted in some rather distorted pictures. But why not simply be honest and take pictures of my hands… taking pictures? A hand-selfie, so as to say. That would also keep my hands busy so they wouldn't get distracted by the camera, while they, I mean while I am taking the pictures. It would look all natural and not at all contrived! So I put a mirror into the kitchen. That's perfectly normal, because people need mirrors in the kitchen, for checking how they look chewing and so on.

Finally I came to the conclusion that the most appropriate way of showing my cuffs is hanging them from the oven...

But seriously: What is most important to you when you take pictures for your blog? How important is the "Showing"-part compared to the "Making"-part? Do you think a lot about the presentation or do you prefer it as simple as possible? Or do you even have certain "styles" that you repeat (like a pose or a certain background)?

Love
Eta Carina

Montag, 6. Oktober 2014

Crochet Power

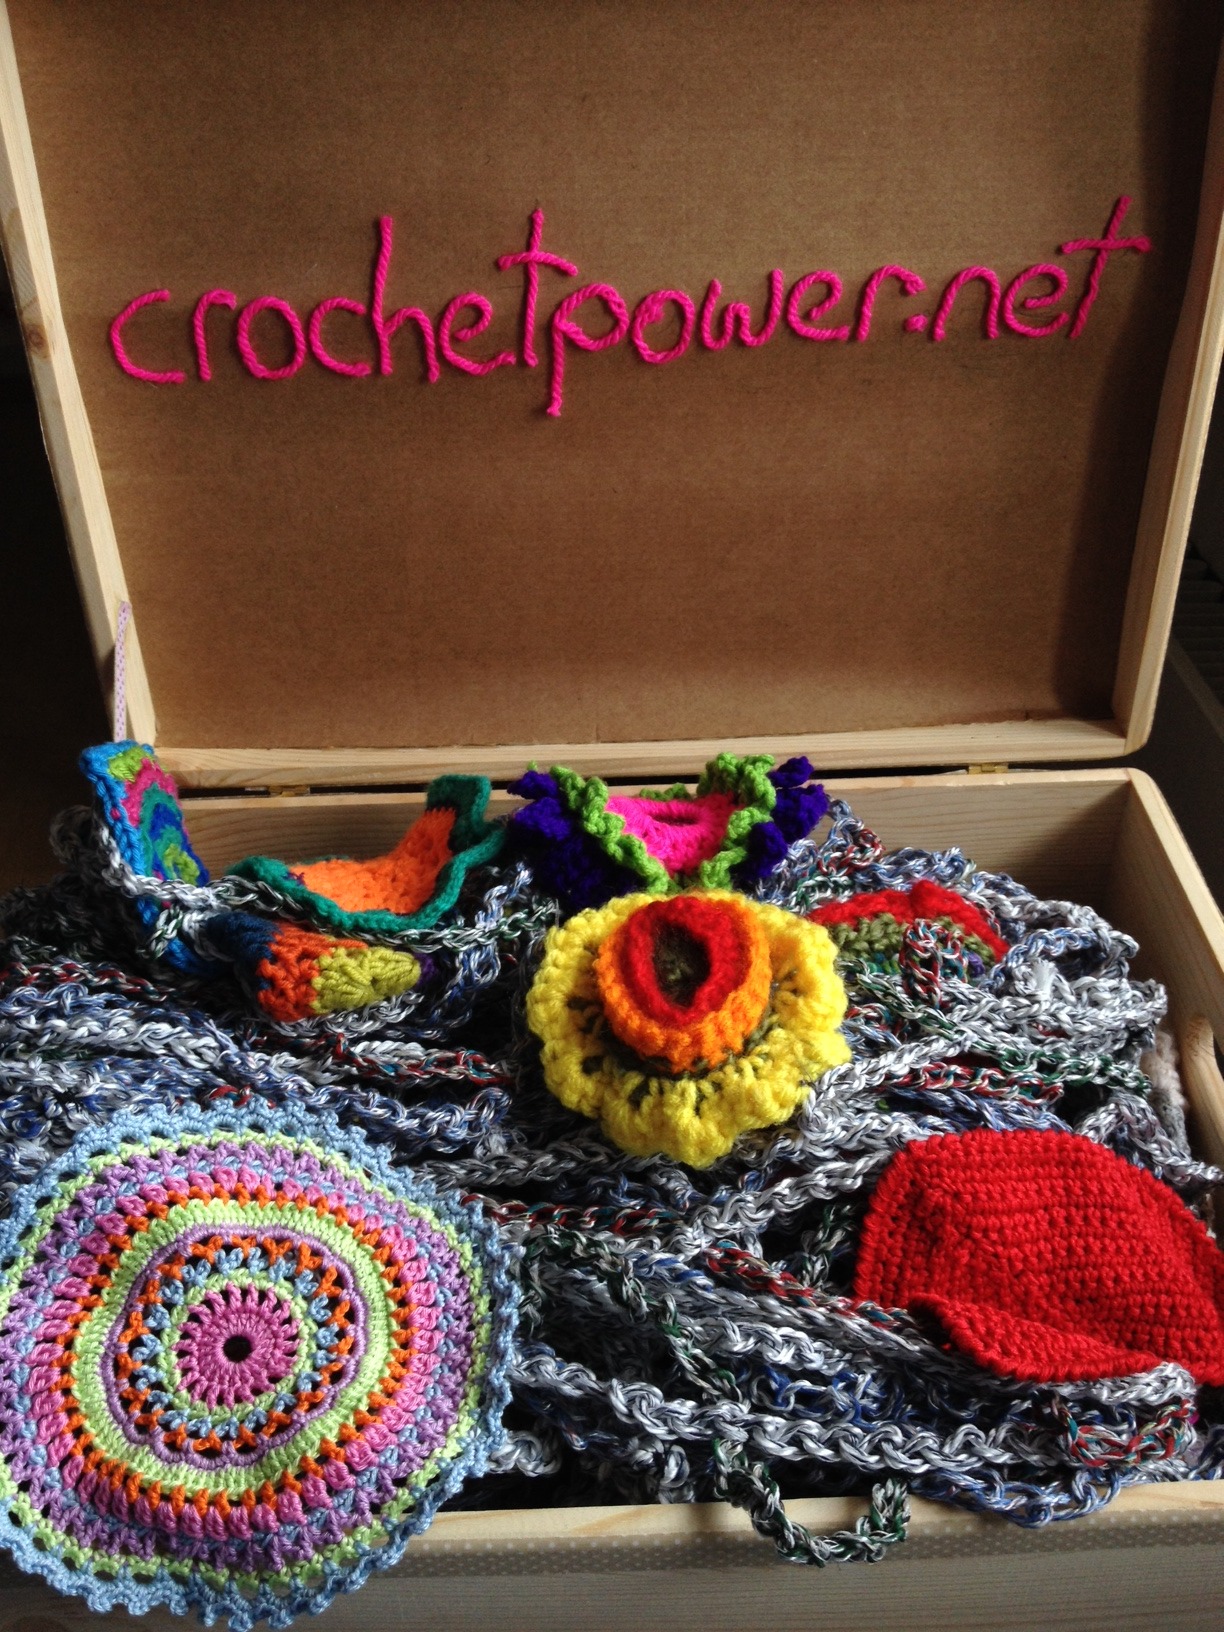
Heute möchte ich euch ein tolles Projekt vorstellen: Crochet Power.
Dabei handelt es sich um eine Plattform, welche die Künstlerin Sabina Speich 2013 gegründet hat. Ziel ist es, Menschen zusammenzubringen, um gemeinsam an einem Projekt, z.B. einem Netz oder einer Decke, zu häkeln. Dabei sind die Häkelnden nicht nur online über die eingesendeten Häkeleien verbunden, es finden auch immer wieder Anlässe statt, um zusammenzusitzen und gemeinsam zu handarbeiten. Aus den kleinen Einzelteilen der Einzelpersonen entstehen grössere Gebilde. Die so entstandenen Werke werden dann jeweils für einen guten Zweck versteigert. Aktuell sucht Sabina Speich Leute, die Häkelblumen oder Granny Squares häkeln. Noch bis am 14. Dezember 2014 könnt ihr euch für diese Aktion anmelden, eine Blume häkeln und einsenden.
Die Einzelstücke werden dann zu einer Häkeldecke zusammengenäht. Diese wird zu Gunsten von Avanti donne versteigert werden, einer Kontaktstelle für Frauen mit Behinderungen oder chronischen Erkrankungen.
Hier könnt ihr die Blumen sehen, die schon eingetroffen sind:
http://crochetpower.net/blumen.html

Bild von http://crochetpower.tumblr.com

Sabina Speichs Engagement hat einen persönlichen Grund: 2013 litt sie selber an einer Erschöpfungsdepression und fing im Rahmen einer Therapie an zu häkeln. So ist das Häkeln also nicht bloss ein Anfertigen schöner Dinge, sondern auch eine Strategie, selbst wieder auf die Beine zu kommen. Darum gefällt mir dieses Projekt auch so: Aus einer Situation heraus, wo es ihr selbst schlecht ging, hat sie eine Möglichkeit gefunden, nicht nur sich selbst zu helfen, sondern etwas zu schaffen, das viele Menschen verbinden kann und Freude bereitet.

Blumen oder Granny Squares zu häkeln ist gar nicht so schwierig, geht schnell und macht Spass. Ich habe dazu ein paar Anleitungen herausgesucht:
Rund häkeln
Granny Squares häkeln
Einfache Blumen häkeln

Eine gute Sache also, die aber nur funktioniert, wenn möglichst viele Leute mitmachen. Also schnappt euch Garn und Häkelnadel und macht mit!

Bis bald
Eta Carina

P.S.: Das sind meine beiden Blumen, die ich diese Woche noch auf die Post bringen werde :-)


Today I'd like to present you a great project: Crochet Power.
It is a platform, formed in 2013 by the artist Sabina Speich. Its goal is to bring together all kinds of people to crochet a bigger object together, like a giant net or blanket. The crocheters aren't only connected online through their work, but also offline through various events, where they can meet and craft together. The small single pieces form bigger things. These are then sold at auctions, the money gained gets donated to charity. At the moment, Sabina Speich is looking for people who may crochet flowers or granny squares. Until the 14th of december 2014 you can register on her website, crochet a flower and send it to her.
All the flowers get sewn together to a blanket. This blanket will then be auctioned and the benefits go to Avanti donne, a point of contact for women with disabilities or chronical ilnesses.
 Here you can look at the pieces that have already arived:
http://crochetpower.net/blumen.html

Sabina Speich's Engagement has a personal background: In 2013 she suffered from a depressive exhaustion and started crocheting as a therapy. So for her, crocheting isn't only a way to create nice things but also a strategy to get on one's feet again. That's why I'm so impressed by this project: From a situation where she felt bad she found a way to not only help herself but create something that can connect people and gives them joy.

It's not difficult to crochet flowers or granny squares, and it's fast and fun as well. I have looked up some tutorials (in German):
crochet circles
crochet granny squares
crochet simple flowers

So you see it's a good thing, but it only works when there are a lot of people participating. So grab your yarn and hook and join in!

See you soon
Eta Carina

P.S.: Above are the two flowers I contributed :-)